Insignia refrigerators are highly popular among consumers for their design and dependable performance. With features like shelves, energy efficiency options, or user-friendly controls, the refrigerators maintain high-quality standards while offering value to customers. Troubleshooting your Insignia refrigerator effectively can help you save money and avoid unnecessary service calls from technicians. The fridge might encounter cooling problems, watery leaks, and noisy operations, which are some issues that could be resolved with a bit of know-how.
Quick Reference Common Problems and Solutions
| Issue | Cause | DIY Fix | When to Call a Pro |
| Not Cooling | The thermostat settings are dirty, the condenser coils are faulty, and the door seal is faulty. | 1. Check thermostat settings – Make sure they are set correctly.
2. Clean condenser coils – Use a coil cleaning brush or a vacuum to remove dust. 3. Inspect door seal – Replace it if cracked or damaged. |
If the compressor or thermostat is faulty, call a professional. |
| Freezer Issues | Ice buildup, blocked vents, or temperature control malfunction. | 1. Defrost the freezer – Turn off the appliance and let it defrost.
2. Clear vents – Ensure nothing is blocking airflow. 3. Adjust temperature settings – Set the correct temperature on the fridge and freezer. |
If the temperature control or defrost system is broken, contact a technician. |
| Strange Noises | Loose parts, malfunctioning fan or compressor. | 1. Tighten loose parts – Check for loose screws or panels.
2. Clean fan – Dust off the fan blades. 3. Level the fridge – Make sure the fridge is standing evenly. |
If the compressor or fan motor is malfunctioning, call a professional. |
| Water Leaks | Clogged defrost drain, door seal issue, or drainage tray overflow. | 1. Clear defrost drain – Use warm water and a pipe cleaner to remove blockages.
2. Check door seals – Replace damaged seals. 3. Empty drainage tray – Ensure the tray is not overflowing. |
If the drainage system or door seal needs replacement, call a technician. |
Clean condenser coils: Clean the coils with either a vacuum cleaner with a brush attachment or a dedicated coil brush.
Defrost the freezer: Switch off the refrigerator and let the freezer completely defrost so no ice is accumulating. Check the door seal Inspect the seal by closing the door on a piece of paper. If the paper slides with ease, the seal is broken and should be replaced. Tighten accessible components: Walk around the refrigerator and make sure that all screws and fasteners are tight. Making sure it is level: If the fridge is not level do use a spirit level to check it is flat on the floor
Detailed Troubleshooting for Key Problems
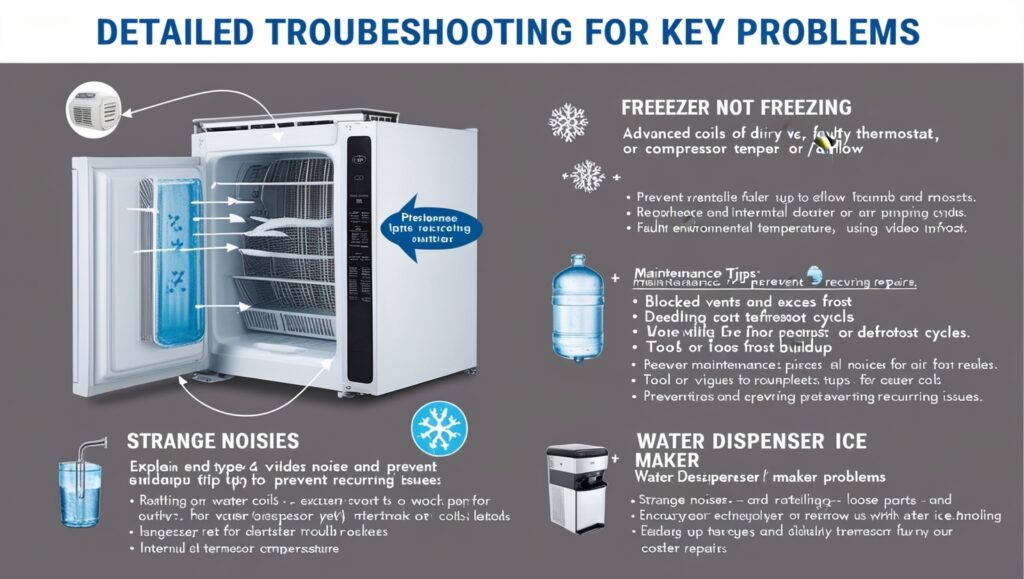
Not Cooling
- Dirty Coils, Thermostat Issues, or Compressor Damage — Professional Repairs
Dirty Condenser Coils
Keep condenser coils clean (as often as needed ). The coil should always be clean; it gets layers of dust and dirt gradually, and that even affects refrigerator performance. If possible, clean the coils every 6-12 months with a coil brush or vacuum with a brush attachment. It can also drastically improve cooling. Faulty Thermostat A broken thermostat is one of the reasons the fridge does not; Test continuity with a multimeter. If there’s no continuity, you’ll probably need to replace the thermostat.
Compressor Issues
If the compressor is not working, your fridge will not cool properly. While compressors typically require professionals to repair, checking the compressor’s relay switch can reveal whether the issue is electrical. Environmental Factor (Room Temperature/Airflow) What else is around a refrigerator that can affect its cooling performance? Room Temperature: Avoid placing the fridge in direct heat, like sun, a stove or a heater. Ambient warm air around the fridge can make the compressor run hot. Airflow: Ensure the fridge has enough ventilation, especially behind it. Airing restrictions will cause appliances to overheat.
Freezer Not Freezing
Defrost cycles To Address Corroded vents and/or excessive frost. Clogged Vents: When vents are clogged, they hinder the flow of cool air in the freezer, disrupting its temperature. Clear any obstructions around the vents and in the freezer. This ensures proper airflow as well as preventing freezing problems. THE FREEZING EFFECT CAPACITY CAN BE VOID Do it yourself: Complete a defrost cycle, or shut the fridge off and allow the ice to thaw. A hairdryer can speed up the process of defrosting something, or a plastic scraper can chip away at ice buildup. Inspect the door seals. A damaged seal can let in warm air, which can then cause frost to develop inside.
- Water Dispenser and Ice Maker Problems
- DO keep your appliances maintained so problems don’t come back:
- A dirty clogged water filter can restrict the flow of water to the dispenser and ice maker.
- Replace your water filter every 6 months to let out enough water.
- When the water stops dispensing, the water line may be frozen.
- Set the temperature of the freezer properly and ensure that the water line is not exposed to cold air.
- When freezers or refrigerators don’t work Ice Maker Not Making Ice Check that the ice maker is on and examine the water supply.
Monitor the ice maker components (water valve, thermostat, and motor. USAGE Use it with images or video links on the theme. Readers also love you to add images to your drawings or links to tutorials on how to copy them. If you want a visual cue, you can attach YouTube videos on how to clean the water filter or defrost the ice maker.
Strange Noises
- And the sounds and their meanings
- This could indicate that items like shelves or panels are loose.
- See if there are any screws or parts that need tightening, both inside and outside the fridge.
- Buzzing This may be the compressor or fan.
- Clean the fan blades, and check compressor operation. If the noise persists, the motor must be replaced.
- These sounds might be due to the fridge’s defrost cycle or plastic parts expanding.
- Most of these types of sounds aren’t harmful, but regular cleaning and maintenance will keep them to a minimum.
- Prompt Fixes on Expensive Fixer-Uppers
Please note: Noisy components can be an early warning sign of bigger issues, like a bad compressor or fan. Bringing small issues to your attention before they can develop into larger issues and more costly repairs will end up saving you expensive repairs later on.
Water Leaks
Show Signs Internal v’s External Leaks to Help Diagnosis: Internal leaks: Usually caused by problems in the defrost drain frozen water lines, or defective seals. Clear the defrost drain, inspect the water line, and replace worn seals. condensation build-up or bad door seal Do it yourself workaround: Check and clean the door seals. Make sure the fridge is level (otherwise, the water will collect in the bottom).
Energy Optimization Tips
So we have the only Food storage chart you will ever need to get the settings straight for different foods! Understanding these needs can allow you to keep your groceries around longer, and increase overall refrigerator efficiency.
Recommended Temperature Per Food
- Fresh Produce (Fruits and Vegetables): Crisper drawer at a warmer 40-45°F (4-7°C) Helps prevent items from freezing, while still keeping them fresh.
- Dairy Products: Store on the upper shelf where temperatures are more constant (37-40°F or 3-4°C). Meats and Fish: The bottom shelf of the fridge is the coldest part of the refrigerator, typically around 32°F (0°C), so is the best place for these foods.
- Eggs: Store in the main part of the fridge (not the door), if possible directly below 37°F (3°C).
- Leftovers: As long as you keep them in airtight containers in the fridge at ∼37-40°F (3-4°C), they’ll be safe. WHAT TO REMEMBER: Keep a fridge thermometer to be sure that each food group is stored at the right temperature — or below. Taming Clutter to Lower Power Bills

Why Decluttering Helps
A crowded fridge has poor air circulation which leads to ineffective cooling. This makes the refrigerator run harder, which consumes more power.
How to Declutter
Arrange these throughout your fridge judiciously, allowing for air to flow easily around the products. Check that heavy objects aren’t blocking any vents. Some bins or dividers help you group like items together, allowing you to find what you need without having to prop the door open for too long. Not only does this prevent waste, but it will also prevent food that has been left for too long from using energy unnecessarily.
How Cleaning Helps
Clean condenser coils weaken cheap fridges and waste energy. Clean the coils by vacuuming or using a coil brush at least twice a year. Gasket cleaning Wipe down door seals regularly. Dirty or damaged seals can let in excess cold air, forcing the refrigerator to work harder to keep things cool. Pro Tip More on that dirt up there — if it’s built up inside, make sure you clean the evaporator and condenser fan so that they’re blowing through unobstructed. Be climatic stretch the use of the seasons: What to save for heat waves, cold weather, and everywhere in between
Winter Tips Cold Climates
Keep your refrigerator away from any sources of heat to help it run efficiently during the winter months, when it doesn’t need to work as hard to stay cool. Consider adjusting the refrigerator temperature if you reside in a colder climate; this adjustment may be safe for food storage without any risks to its freshness.
Summer Advice for Warm Weather
Make sure the fridge has ventilation by leaving space around it to let air circulate especially during warmer months when the compressor needs to work harder. Avoid opening the refrigerator door as it strains the cooling system when exposed to heat; limit the frequency and duration of door openings to lessen its workload. In the summer months when your kitchen gets warm and stuffy consider using fans to cool down the area making it easier for your refrigerator to operate efficiently.
Everyday Tips, for All Seasons
Consider upgrading to an energy refrigerator if your current one is, over a decade old as newer models consume power and maintain temperatures more effectively. Be sure to monitor this temperature Make sure your refrigerator is running within the temperature range (37 to 40 degrees Fahrenheit or 3 to 41 degrees Celsius, for the fridge and 0 degrees Fahrenheit or 18 degrees Celsius for the freezer). Over-cool or under-cool and waste energy.
Installation and Initial Setup
Flushing Out Your Dream Room Temperature
Ambient temperature should be 60°F to 75°F (15°C to 24°C) for Refrigerators If the room temperature low(50°F or below- 10°C) Then the fridge will not work properly If the fridge creates the destination to stop food going off, the room’s too warm, and the fridge needs to effort tougher, using up more energy and reducing its age expectancy.
Spacing Tips
At least 2-3 inches of space on both sides and top of fridge for air. Air should circulate freely around the refrigerator, including the condenser coils. Never position the fridge in the sun or next to the stove or radiator. The heat can cause the fridge to overheat and draw even more energy. Level out the fridge: Ensure the fridge is level, from side to side and from front to back. It stops the fridge from shaking during operation and aids in the correct sealing of the doors as well. Set it level with a spirit level. Pro Tip If your refrigerator is flush against a wall or cabinet, leave plenty of space at the rear to allow for airflow.
- First-Time Setup Checklist
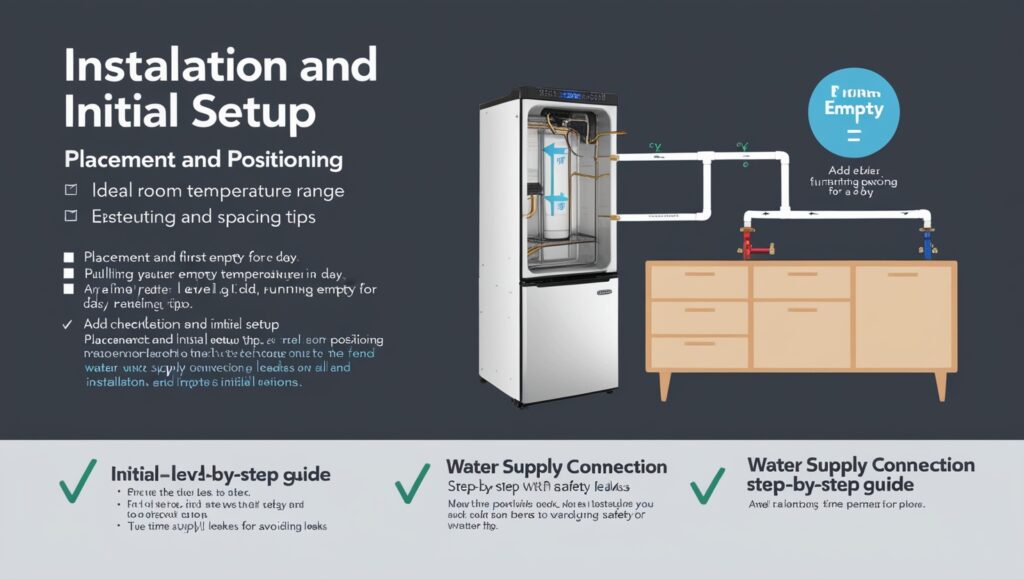
This is a small checklist that you need to cross-check every time you plug in your Insignia refrigerator for the first time to ensure that everything is in its place.
- First-Time Setup Checklist
- Level the Refrigerator
- Use a spirit level to ensure the fridge is level on all sides of it. Raise all legs so that none will leave the ground.
- Allow the Fridge to Settle
- If your refrigerator was transported on its side, you must stand it upright for a minimum of 2-4 hours before plugging it in.
- Running Empty for a Day
- It’s also a good idea to run the fridge empty for the first 24 hours just to verify that it’s cooling properly, and give a chance for the thing to stabilize before putting food into it.
- If your fridge has a water dispenser or ice maker, there is a connection that could be leaking.
- Refrigerator and freezer temp: Make sure the refrigerator is set to 37-40°F (3-4°C) and the freezer is set to 0°F (-18°C).
- Store on shelves and in drawers for easy access and air circulation. And place heavier items on the bottom shelves to help with balance.
Water Supply Connection
Step-by-Step Guide
- To prevent leaks you might not see in time, turn off the main water supply before you start.
- Connect the Water Line
- Go to the back of your fridge and locate the water line hook-up. Indirectly, this means you need to connect 1/4-inch plastic or copper tubing to the fridge’ss water inlet valve.
- Cut the tubing so it is clean and makes a tight fit in the valve. If a tight seal is needed, use a compression fitting
- Secure the Tubing
- Then, you will need to run the tubing from your fridge to your water source. Avoid kinks in the tubing or build-up pressure.
- Hold the tubing in place with a bracket.
- Turn on the Water Supply
- From there you can head out and turn the water source valve back on once the tubing is fastened. Gradually turn the water back on and inspect for leaks.
Check for Leaks
Check the water line, the connections,, and the back of the fridge for leaks. If you see moisture leaking, you must stop the supply and refit the joints. Check the Water Dispenser/Ice Maker After connecting the water, make sure the water dispenser and ice maker are working. After the first batch of ice produced by the icemaker has frozen, confirm that the dispenser is operating the way you want it to.
Safety Tips
Use the proper water line Use the correct size of water line (typically 1/4-inch plastic or copper) so it Check the connections: First, make sure all of your water line connections are tight. Be sure to put plumbing tape on the inside threads of the connectors, if needed, to protect against leaks. Don’t over-tighten: While the joint should fit snugly, too much tightening can crack the fittings. Drain or water connection installations may need a little professionalism or reserve in that regard and consult a plumber or technician as small leaks can do damage.
Proactive Maintenance and Care
Cleaning Essentials
- Equipment for cleaning condenser coils and changing filters.
- Condenser Coil Cleaning.
- Vacuum Cleaner: If a vacuum cleaner is available, use a vacuum cleaner equipped with a brush attachment to clean up dust and debris from condenser coils. For quick and effective cleaning this tool does a good job. Coil Cleaning Brush A coil brush will help you scrape dirt away from tight spots around the coils. What is one great cleaning-up tool when you don’t have a vacuum cleaner? Compressed Air To take it a step further, you can use compressed air (particularly around the coils) and blow dust from hard-to-reach places.
Filter Replacements
If you have a refrigerator with a water dispenser or ice maker, it likely has a water filter. You must replace the filter every 6 months or as recommended by the manufacturer to ensure clean water and ice. The around wrench tool or hand twist can complete the expulsion and association strategy of the water filter. Be sure to check the model number to make sure you’re using the right filter. Follow the instructions in the user manual to replace it.
Air Filter Some models are equipped with an air filter to help reduce household odors from permeating your fridge. Air Can Stop The Development Of The Grown Breath ING Device Willo Which Filters These Get Forever New. schedulers These Are Cleaning As Much Periodically Can To Avoid.
Depending on the fridge design, you might need a screwdriver to access the air filter and remove it.
Maintenance Calendar
A maintenance calendar can help readers stay on top of cleaning and maintaining their refrigerator. Here’s a simple template
| Task | Frequency | Tools Needed | Notes |
| Clean Condenser Coils | Every 6-12 months | Coil brush, vacuum, air can | Check coils for heavy dirt. |
| Replace Water Filter | Every 6 months | New filter | Ensure the right filter model. |
| Replace Air Filter | Every 6 months or as needed | New air filter | Check for odor or clogging. |
| Clean Refrigerator Interior | Every 1-2 months | Cleaning cloth, mild soap | Wipe down shelves and drawers. |
| Check Door Seals for Gaps | Every 3 months | Damp cloth | Clean seals and check for cracks. |
| Defrost Freezer (if applicable) | Every 6 months | Hair dryer, scraper (optional) | Prevent ice buildup. |
This table can be included in the article for readers to print out or keep as a reference to maintain their refrigerators.
Door Seal Checks
Techniques were used for the Testing of the Seal. Door seals are crucial, for maintaining the efficiency of your refrigerator as they help retain air while keeping warm air outside effectively intact and intact; a cracked or worn seal leads to decreased efficiency, in the fridge operation and can result in higher energy costs for you.
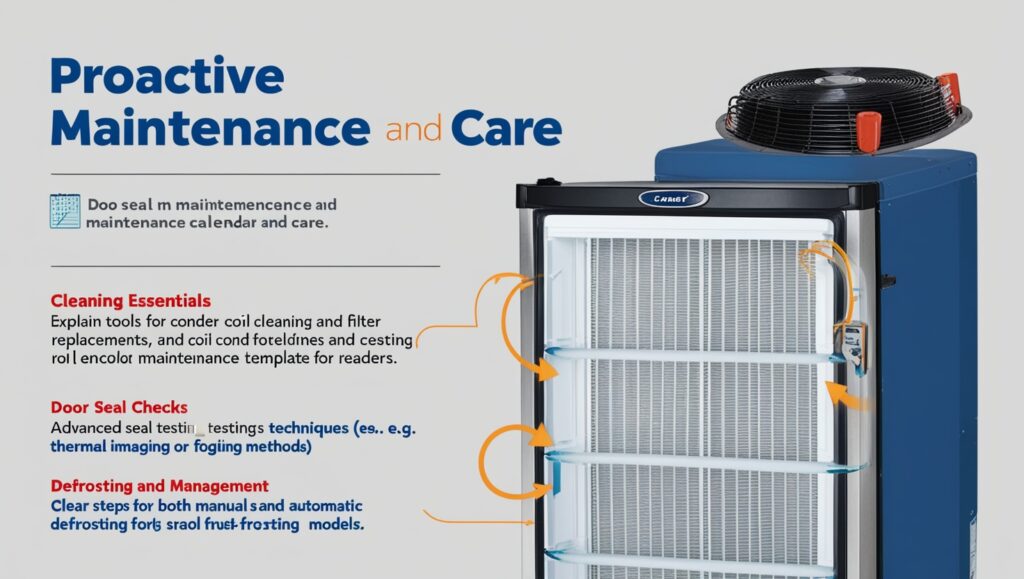
Testing Door Seals
The most reliable method for testing the door seal is via a thermal imaging camera. This allows you to see heat escaping around the seal visually. In the context of the cooler, if there are cold spots , then the seal will have to be replaced.
Fogging Method
Hook a paper or small cloth strip on the edge of the refrigerator door. Next, activate a fog machine around the seal. If you can see light or fog seeping along the edges of the door, the seal has been damaged. Move into a dark room and shine a flashlight around the the door seal; take note of gaps where light breaks through. If you can see light, the seal is no longer intact.
Quick Manual Test
Paper Test — Insert a piece of paper into the door and test if you could remove it. If it doesn’t slide out easily, its door seal may be loose or damaged. That is a simple and fast way to find out. Pro tip: If you spot any leaks, change out the door seal immediately to save energy and keep your groceries fresh. Thawing & Frost Control
Steps for Manual Defrosting
Pull the freeze delight or somethin’. So this will interrupt the cooling process while you defrost. Take out all food from the freezer. If you have to, keep perishables in a cooler. Place towels and/or a pan underneath the freezer to catch drips of water as it melts. The towels need to be replaced frequently to keep the timber from decaying. Grab a hair dryer in a low-heat setting and melt the ice. Keep dryers 6 inches away from the fabric so that you don’t damage the fabric. Or place buckets of hot water inside the freezer (don’t directly place water on the freezer walls) to speed up the melting process. Using a plastic scraper, remove the ice buildup. Never use sharp objects as they can perforate the freezer walls. Once you’ve defrosted, you’ll want to wipe down the interior with a towel to remove any lingering moisture.
- StepsAutomated Models
- Switch Off the Refrigerator Instead of defrosting and forming ice, it is better to switch off the fridge.
- If you have an automatic cycle that runs: If your fridge has an automatic defrost feature, it is likely to run a cycle every 6-8 hours, depending on the make and model.
- Ensure it is not clogged with debris. If it’s stuck, run a pipe cleaner through it to clear it.
- Check the tray that catches water from the defrost cycle. Dump it periodically so it does not overflow.
Advanced Troubleshooting Tips
Error Codes Decoded
A Deeper Dive into Diagnosing Insignia-Specific Error Codes. There are also error codes that can be shown on the digital display of your Insignia refrigerator when there is a system issue. Below are a few common error codes of Insignia and the solution to them: E1 (Temperature Sensor Error) Note: Sensor problems where the temperature sensor no longer reads properly
- Solution
Are all wires connected properly to the sensor?
That would likely require replacing a faulty sensor. Check the fridge manual for the right part number, or have a pro do it. Error Code: E2 (Freezer Too Warm) Cause: The freezer is operating at a higher temperature than is necessary, perhaps due to a blocked vent or an improperly functioning thermostat.
- Solution
Check ventilation: Make sure vents aren’t blocked by ice or food.
Reset the refrigerator: Power off the refrigerator for several minutes, then restore power. If this error continues, troubleshoot the evaporator fan or temperature sensor. Error Code: E3 (Refrigerator Temperature Too High).
Cause: The temp inside the fridge is also too high, which could mean a failed compressor, fan issues or clogged vents. Solution See if the fridge is overloaded or if the air flow is blocked. How to service your air conditioning unit Clean the condenser coils and check that the compressor is running.
- F1 Error Code (Compressor Fault)Cause: A failure of the compressor or its control system.
Solution: Ensure the compressor is getting the correct voltage supply. If there are electrical problems, the cause may be a bad relay or control board that will need to be replaced. Error Code: F2 (Ice Maker Error)
Reason: The ice maker is broken or not supplied with sufficient water. Solution: Check to ensure a secured water line and no blockage. Check the water inlet valve for an electrical short. If your fridge has an error code that you don’t see here, then it’s recommended to look at the user manual or reach out to Insignia support for tailored troubleshooting.
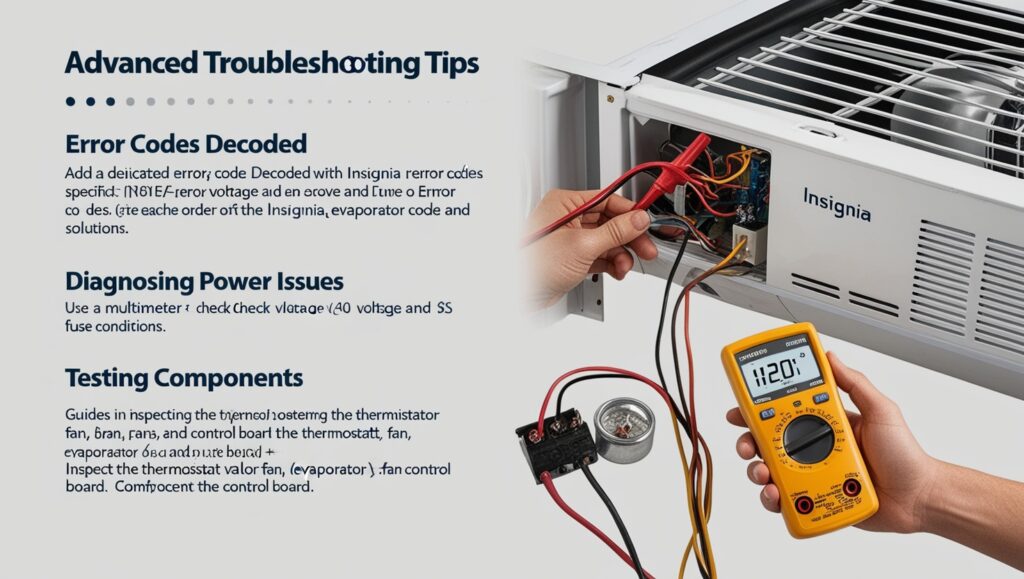
Diagnosing Power Issues
Checking Voltage and Fuse Condition with a Multimeter. Power issues can be difficult to troubleshoot without a proper tool, a multimeter (a device that measures electrical features) can help you check where the fault is in your refrigerator’s power running system. Check the Outlet Voltage Set your multimeter to read AC voltage (V~) .
Step 2: Insert the multimeter probes into the electrical outlet into which your refrigerator is plugged. For North America, the reading should be about 120 volts. If the voltage is low too much or tempered, there is a problem with the power supply.
Test the Power Cord
Step 1: Change the multimeter to continuity test (before that, check if the multimeter has this setting). Then test the power cord from the plug end, step 2 then unplug the fridge. If there is no continuity, the power cord is likely faulty and needs to be replaced.
Check the Fuse
The first step is to set your multimeter to continuity mode. Step 2: Find the fuse on the refrigerator’s control board or the fuse box. Test the fuse using multimeter probes. If the multimeter does not beep, the fuse is blown and needs to be replaced. Check the Main Control Board. Step 1: Check the control board for any obvious damage like burn spots or corrosion. Step 2: Measure for continuity for the boards power using the multimeter. If the board shows no input power, the control board may be defective and require replacement.
Testing Components
How-To Guides on Inspecting Important Components: There are parts of your refrigerator that are very important for cooling and functioning. Here’s one way you can check a few key components:
Thermostat
Signs of a defective thermostat: The refrigerator is too cold or not cold enough. Check the thermostat for continuity with a multimeter. If you do not see continuity when putting it in cooling mode, it is bad and should be replaced. Another method to test it is to adjust the temperature setting and listen for a clicking sound when the thermostat turns on. If you don’t hear the noise when it does so, then it might be that the thermostat is not functioning properly.
- Evaporator Fan
- No airflow or too much frost in the fridge or freezer.
- Unplug the fridge, move it slightly if needed, and check the fan for damage or things blocking the blades.
- Check for continuity across the fan motor with a multimeter. If there isn’t, the fan motor is almost certainly bad and needs to be replaced.
- If you hear the fan motor running but don’t hear airflow, look for ice buildup around the fan blades.
- Control Board
- The fridge does not cool, or the display panel does not respond.
- Are there any burn marks or damaged components on the control board?
- Also, have the multimeter measure the voltage on the board and check that all of the electrical connections work.
- If no voltage is found, the control board might have to be replaced.
When to Call a Technician
Compressor Failure
Symptoms: Fridge is not cool (or at least not as cool as the unruly of people) or unusual wiring sounds (buzzers and rattles).
Compressor (BAD-1314240946 explore) replacement was complicated aur expensive aur safety issues bhi the. Persistent Leaks First, sanitary barter and the second build; Symptoms: Leak of bouldery water, build-up of frost.
Professionally UTILIZED
- Find an authorized technician from the Insignia website or contact customer support.
- Technicians should have recognized certifications and licenses.
- Check Technician Reviews: Read customer reviews to book an expert.
- Warranty: Repair warranty must be there.
Conclusion
In conclusion, a combination of regular maintenance and prompt troubleshooting will ensure that your Insignia refrigerator continues to operate seamlessly. You can make your fridge last longer and save energy by solving the most common problems like frost accumulation, water dispenser not working, strange noises and improper temperatures. Regular condenser coil cleaning, filter replacement and door seal inspection can help avoid plenty of these problems. For some of the more complicated issues, like compressor failure or faulty parts, you should call a technician to prevent exacerbating the damage. By following these tips, you can keep your Insignia refrigerator in top work order, saving time and money on repairs.
FAQs and Pro Tips
How do I enhance the cooling efficiency of my Insignia fridge?
To enhance the cooling efficiency of your refrigerator; Make sure it’s not too full to allow airflow. Set the fridge temperature between 35 and 38 degrees Fahrenheit and the freezer at 0 degrees Fahrenheit. Regularly clean the condenser coils. Ensure door seals to keep cold air inside.
My Insignia fridge is making some sounds lately… Any suggestions, on what I should do, about it?
Uncommon sounds may originate from the condenser fan or evaporator fan or even the compressor itself. Look out for any dirt. Objects around the fan and coils to make sure nothing is blocking them. If the noise persists you might have to examine the fan motor or compressor, for signs of wear and tear.
How do I go about repairing the water leak in my Insignia refrigerator?
Water seepage might be a result of a blocked defrost drain system or worn out door seals or even an overflowing drip tray, at times. Start by checking for any obstructions in the defrost drain pipe. If you find any damage to the door seals of your fridge or freezer unit due to wear and tear over time it’s advisable to have them replaced promptly. In case the drip pan is full. Requires cleaning ensure to empty it out to prevent any issues. If the problem persists despite these efforts it may be necessary to seek assistance, from a professional service technician to resolve the matter.
Why isn’t my Insignia fridge giving out water or ice like it should be doing?
Please make sure the water filter isn’t blocked and doesn’t require replacing and confirm that the water line is securely connected and not frozen solid. Also check that the ice maker is activated and theres water pressure reaching the refrigerators water system. If the problem continues to exist or recur for any reason inspect the water inlet valve, for malfunctions.
Is it possible to adjust the temperature settings of my Insignia refrigerator without referring to the user manual?
Sure thing! Resetting the temperature settings is pretty easy to do on models. Hold down the “Power’ button for around 10 seconds to reset it or you can adjust the settings manually using the temperature controls if you prefer that way instead! Just make sure the fridge is plugged in and not in demo mode when you’re resetting it.
What steps should I take if my Insignia refrigerator is not powering on?
If the refrigerator isn’t starting up start by verifying if its connected to the power source and the outlet is working properly. If theres a power problem try resetting the circuit breaker or inspecting the fuse box. If everything appears to be, in order but the refrigerator remains inactive it could imply a problem, with either the compressor or thermostat.

