Building or maintaining a PC often involves handling sensitive components, and few moments are as frustrating as discovering bent pins on your AM5 motherboard. These pins serve as vital connectors between the motherboard and CPU, and any misalignment or damage can result in boot failures, instability, or even permanent hardware issues. This is a problem that needs to be solved to ensure that your PC is working fine. If ignored, Bent pins lead to costly repairs, or you end up replacing your expensive hardware. Fortunately, with great care, use of the right tools, and precision, bent pins may often be repaired successfully so you can go back and use your motherboard again.
Understanding the AM5 Socket
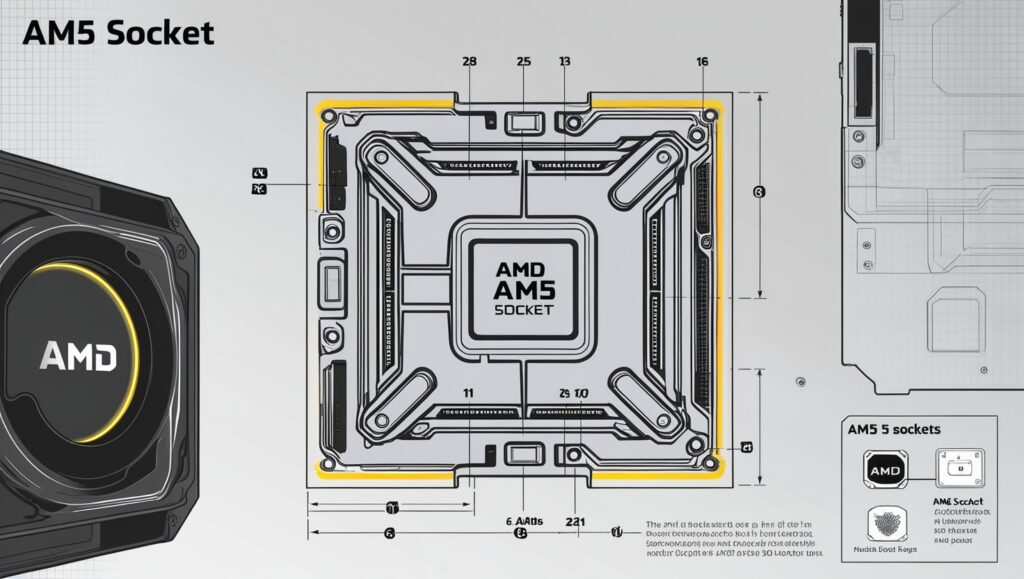
Explanation of the design and pin layout for the AM5 socket
The Land Grid Array (LGA) design is used in the AM5 socket. Instead of the pins being on the CPU, they are located on the motherboard. This is different from the Pin Grid Array (PGA) design, wherein the CPU has pins that stick into socket holes on the motherboard. The LGA design has benefits such as stronger CPUs since they no longer carry the weight of having pins. But it also makes the motherboard socket more susceptible to damage since it carries all the pins. A socket is generally harder to replace than a damaged CPU.
Differences from previous AMD sockets
The change from PGA in AM4 to LGA in AM5 is a shift as to where the focus lies for potential damage. In AM4, bent or broken pins on a CPU could commonly be replaced by replacing only the CPU; in AM5, motherboard pins are more endangered. This shift affects repair and troubleshooting processes. The user is dealing with motherboards, sockets, etc., instead of fragile pins on the CPU, which may be more expensive to replace.
Drawbacks of the pin configuration and advantages of accessibility
In the case of the AM5 motherboard, those closely packed pins tend to be so close that they can be easily bent and damaged due to their dimensions. Mishandling the CPU during installation or applying uneven pressure when closing the retention mechanism can easily cause pin misalignment. Cleaning or debris removal from the socket can also increase the risk of bending pins.
Benefits of accessibility
Since the pins are on the motherboard and not on the CPU, they are more accessible for repair. Using precise tools, users can manually straighten bent pins without needing to replace the entire CPU. The CPU itself is less likely to be damaged, which makes one of the most expensive PC components safer during installation and operation.
Identifying Bent Pins
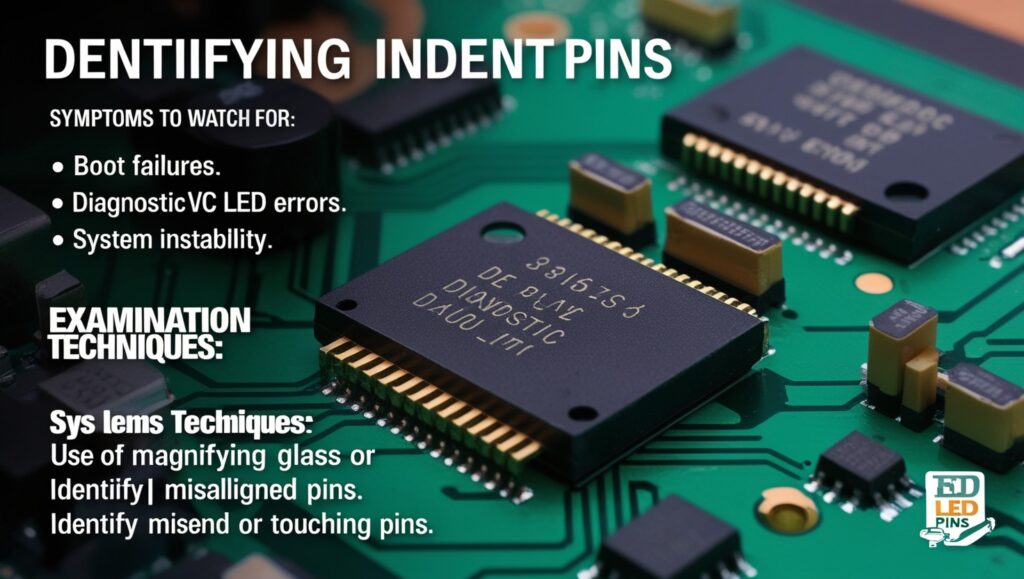
Having bent pins on an AM5 motherboard may cause various forms of disruption to your functioning PC. The first move towards a resolution will be identifying some symptoms and knowing how best to look at the socket.
Symptoms to Identify Boot Failures
The system might shut down before booting and, in some cases not power up. This happens simply because the bent pins failed to ensure proper communication exists between the CPU and its motherboard.
Why it matters: A damaged pin affecting critical signals can prevent the system from booting completely.
Diagnostic LED Errors
What it does Most modern motherboards have diagnostic LEDs or a POST code display that can indicate hardware problems. Errors that point to the CPU or motherboard can indicate bent pins. Why it matters: This visual indication can quickly narrow down the problem, saving time compared to troubleshooting other components.
System Instability
If the system turns on but is experiencing random crashes, freezing, or performance drops, then bent pins may be partially obstructing communication between the CPU and motherboard. Why it matters: Such intermittent issues can lead to data loss or hardware damage if not addressed promptly.
Examination Techniques
Use of a Magnifying Glass or Macro Lens How it can help: The pins of the AM5 socket are minuscule and crowded; not easy to be visually examined the naked eye. One could employ a magnifying glass, or even better – attach a smartphone camera with a macro lens. What to inspect for: Look closely at the socket. Look for any pins which look more out of line than others. Alternatively, look for any that seem more bent than other pins.
Identifying Misaligned or Touching Pins
A misaligned pin can point in the wrong direction. It does not touch the CPU properly. When the pins touch each other, a short circuit may occur or even distort the signal. How to identify them The rows and columns of the pins are supposed to be parallel and uniform in spacing. If they are not, then that is damage.
Tools Required
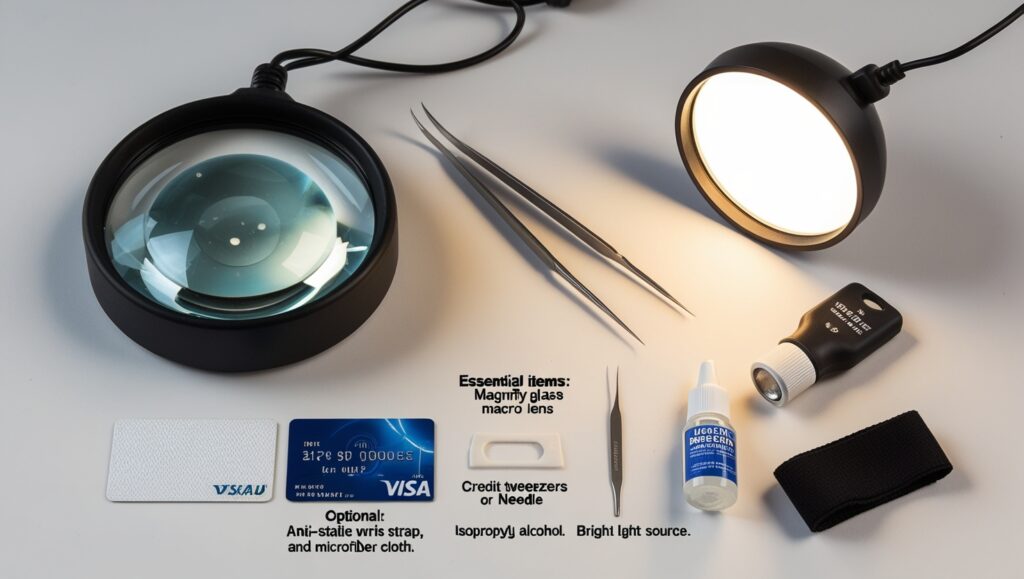
Essential Tools to Straighten Bent Pins
Straightening bent pins on an AM5 motherboard is a slow process that demands patience and precision. Here’s a list of essential tools, with their purposes and how they can be effectively used for the task.
Magnifying Glass or Macro Lens
- It is necessary to closely examine the pins in the AM5 socket.
- Why it’s needed: The pins are incredibly small and tightly arranged, making it almost impossible to identify bends or misalignments with the naked eye.
- How to use it
- Hold the magnifying glass above the socket for an enlarged view.
- Alternatively, use a smartphone camera with a macro lens attachment to zoom in on the pins and capture detailed images.
Precision Tweezers or Needle
- To carefully straighten bent pins.
- These aids make it easy to carefully pull the pin without making another hole or damaging it.
- Grasp the deformed pin with tweezers carefully or nudge it gently back to shape with the help of a needle
- Do not be too vigorous as these pins are frail and prone to breaking 3. Credit Card or Thin Plastic Card
- Intended to Straighten up several pins all in the same row.
- A thin card can straighten several slightly bent pins at once, ensuring they are aligned evenly.
- Push the edge of the card between rows of pins and gently slide it to straighten and align them.
- Be careful not to press too hard, as this can bend more pins.
Bright Light Source
- To illuminate the motherboard socket for better visibility.
- Lousy lighting can make it hard to see crooked pins, which may be damaged further.
- Place a desk lamp or use a flashlight to shine directly on the socket when examining and replacing the pins.
Nice but Not Necessary Tools
- Anti-Static Wrist Strap
- Prevent ESD that can destroy the motherboard.
- Wear the strap and attach it to a grounded surface while working.
Isopropyl Alcohol and Microfiber Cloth
Clean the socket, eliminating any debris or residue that might interfere with the pins
Dampen the cloth with isopropyl alcohol and clean the socket area without applying too much liquid.
Fixing Bent Pins
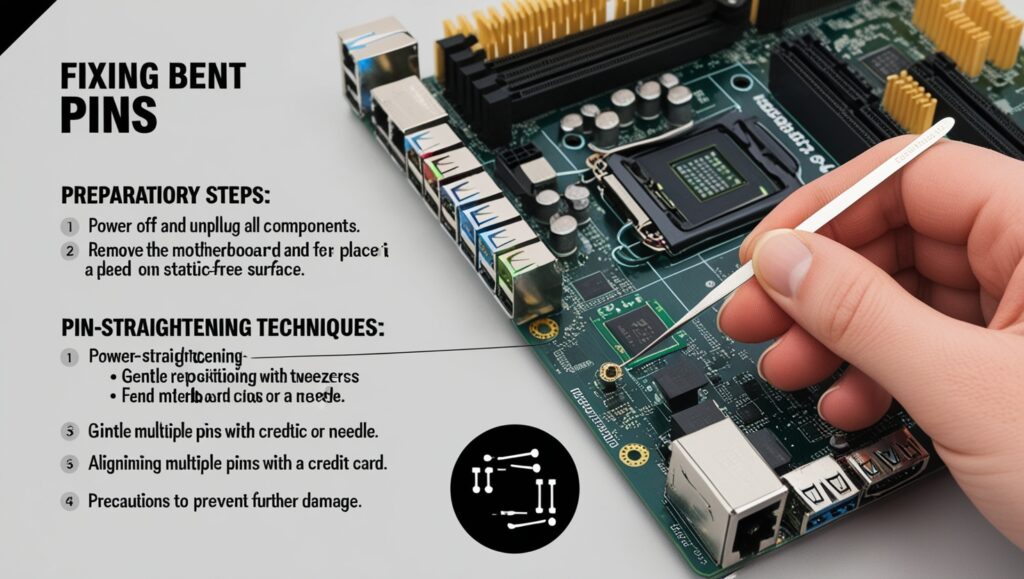
Preparatory Steps and Pin-Straightening Methods
- How to Straighten Bent Pins on an AM5 Motherboard
- Preparing for the procedure and carefully handling the board is the key to ensuring that one does not further damage it. Here are the necessary steps and techniques:
- Preparatory Steps
- Power Down and Unplug All Apparatus
- To get rid of the possibility of electrical shock from the motherboard or to your person while attempting to fix it.
- Switch off the power source and pull out the computer.
- All the cables connected to the motherboard have to be removed, such as power cables, data cables, and peripherals.
- Remove the Motherboard and Put It on an Anti-Static Surface
- To work easily and not cause electrostatic discharge, which can harm sensitive components.
- Carefully disconnect the motherboard from the case, unscrewing it.
- Position the motherboard on an anti-static mat or a clean, non-conductive surface. Put on an anti-static wrist strap if you have it, for grounding yourself during this process.
Techniques for Straightening Bent Pins
- Careful Handling with Tweezers or Needle
- Using a magnifying glass or macro lens, locate the bent pin.
- Hold the tweezers or needle firmly and gently push the pin back into its proper position.
- Work slowly to not bend the pin. A small movement is usually enough to move it back in line.
- Don’t overbend; this strains the pin.
- Don’t press too hard to not snap or over-correct the pin.
- Straightening Several Pins with a Credit Car
- Carefully push a thin plastic card (like a credit card) alongside rows of pins.
- Guide the card through the row to nudge slightly bent pins into their correct position.
- Make sure the card is thin enough to fit without causing further bending.
- Ensure the card remains perpendicular to the socket for proper alignment.
Caution to Avoid Further Damage
- Work in a Brightly Lit Area
- Use a strong light source to see the pins well and avoid unnecessary handling errors.
- Handle the Socket Cautiously
- Apply minimum force to avoid snapping of pins or damaging adjacent pins.
- If a pin feels resistant, stop and reassess its position to avoid breaking it.
- Maintain Static Safety
- Use an anti-static wrist strap to prevent electrostatic discharge, which can permanently damage the motherboard.
- Double-Check Your Work
- After straightening, inspect the pins again to ensure they’re aligned evenly and none are touching or out of place.
Testing the Repair
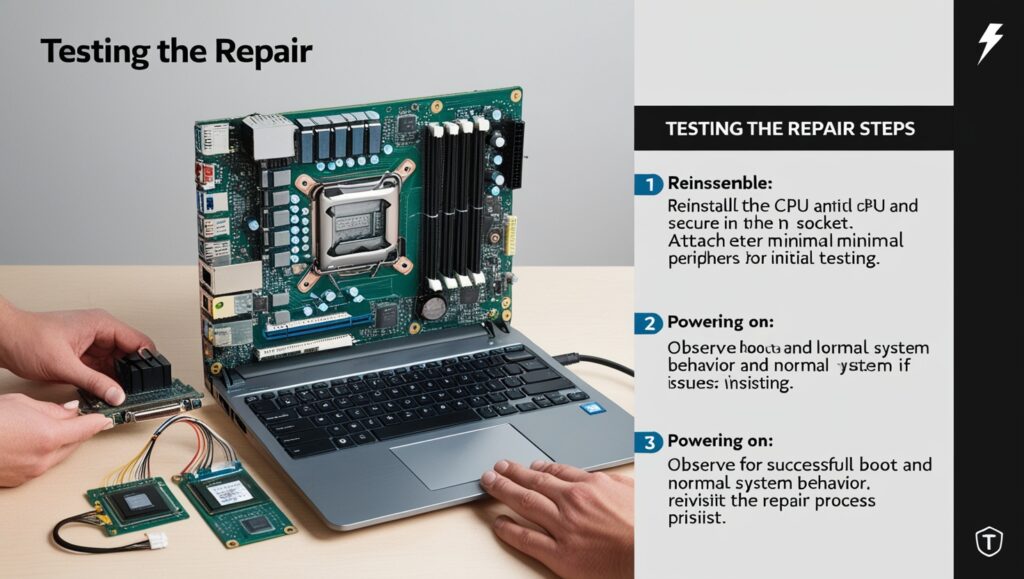
Steps to Reassemble and Test After Straightening Bent Pins
Having successfully straightened the bent pins on your AM5 motherboard, it is now time to reassemble your system and test its functionality. Below are the steps for reassembling and verifying that everything is working properly:
- Reinstall the CPU and Secure It in the Socket
- Reinstall the CPU
- The CPU is the component that must be fitted properly into the socket so that connections can be made to the pins of the motherboard.
- Align the CPU to the socket by matching it to the alignment markers.
- Gently drop the CPU into place without forcing it too much.
- Ensure the CPU is firmly seated in the socket.
- Secure the CPU in the Socket
- This locks the CPU in place so that it will maintain good contact with the pins on the motherboard.
- Close the socket’s retention arm or mechanism to secure the CPU. Make sure it is locked into position.
- Do not force the mechanism it resists, double-check the CPU alignment and make sure no pins are obstructed.
- Connect Minimal Peripherals for Initial Testing
- Connect Essential Components
- You simply need the minimum peripherals for testing the motherboard quickly so that you know it’s working properly after the repair.
- Connect the power supply to the motherboard.
- Connect the monitor and ensure the connection is good (HDMI or DisplayPort).
- You may connect a keyboard and mouse for full control over the system but are not required for initial testing.
- If your motherboard comes with debug LEDs, use them to view any potential errors.
- Test Setup Is Safe
- This is for minimal handling of the board during the test and chances of damaging the board.
- Set the motherboard on a static-free pad or anti-static mat
- Make sure that the CPU is in its socket firmly without any loose connections
Power On
- Power ON the System
- Turning on the system lets you check if everything works properly after the repair.
- Press the power button on the case or directly on the motherboard if the button is accessible.
- Observe the system’s behavior, especially during the boot process.
- Observe for Successful Boot and Normal System Behavior
- If the motherboard is healthy, you’ll see a normal POST screen or hear the computer’s startup beep.
- Motherboards equipped with diagnostic LEDs should light up to confirm that everything is fine.
- After booting into the OS, it should behave like a healthy system (move the mouse, open some applications, etc.).
Revisit the Repair Process if Problems Persist
- What to do if problems arise:
- Boot Failure or System Instability:
- If the system doesn’t boot or exhibits instability (e.g., random crashes or error messages), it could be an indication that some pins were not properly straightened, or additional issues exist.
- Revisit the motherboard socket and carefully inspect the pins again for any misalignment.
- If necessary, try to align the pins again, but take extra care with those pins that were hard to get aligned in the first attempt.
- Persistent Diagnostic LED Errors
- If the diagnostic LEDs continue to show errors for the CPU or motherboard, check the seating of the CPU and the integrity of all pins.
- If the error persists, there could be a more serious problem. It may be worth considering professional help.
Preventing Future Issues

Preventing Future Issues with Bent Pins
Once you’ve repaired the bent pins and successfully reassembled your AM5 motherboard, it’s essential to adopt practices that reduce the risk of future pin damage. Proper handling and preventive measures can go a long way in ensuring the longevity of your motherboard and CPU. Here are some helpful tips to avoid bending pins in the future:
Tips for Safe Handling
- Always Hold the CPU by Its Edges
- The pins of the CPU are fragile and can be broken easily through direct contact by fingers or mishandling.
- During installation or removal of the CPU, hold it by the edges without touching the underside or the pins.
- Keep your hands dry and oils or dirt-free, as both can interfere with the CPU connection and cause problems.
- Careful Alignment Before Installing the CPU
This is because if the CPU is not aligned well, one can easily bend the pins if they force it into the socket. Proper alignment is therefore important to allow the CPU to make the right connection with the motherboard pins. Double-check the alignment notches on both the CPU and the socket before placing the CPU in the socket. Carefully let the CPU drop into the socket with gravity. Avoid pressing it. If resistance occurs when trying to press the CPU into the socket, stop immediately means it is not properly aligned.
Using Protective Covers and Anti-Static Storage for Components
- Why does this matter: Always store and move CPUs and motherboards with clean, statically shielded environments that do not contain dust to keep them in a clean state.
- Always protect the CPU and motherboard during their unused state in their plastic cases or covers.
- Keep items inside anti-static bags in case of being transferred so they cannot cause an ESD problem, destroying sensitive pins or circuits inside the device.
- Avoid mounting components on metal or conductive surfaces, as these collect an awful lot of static.
- Other Preventive Measures
- Use an Anti-Static Wrist Strap
- While you spend working time on the motherboard and CPU.
- It ensures you stay grounded while you’re working, and it guards against anything nasty an electrostatic discharge could do to hurt.
- Attach the wrist strap to a grounded object, like a metal part of your computer case or a grounded power supply, to ground yourself safely against static electricity.
- Work Area Should Be Dust-Free and Clean
- Why: There’s a chance that dust or debris could fall into the CPU socket or motherboard pins, and prevent them from making contact properly. Problems will develop such as overheating and short circuits
- Work in a clean, well-lit area. Clean your workspace often with a microfiber cloth so that dust does not accumulate.
- Do not eat or drink near your components to keep the area clean of crumbs or spills.
When to Seek Professional Assistance

Indicators for the Expert Intervention
Though, with patience and precision, it is possible to repair many of the bent pins on the AM5 motherboard, sometimes further damage can be prevented only when the intervention of experts occurs. Here are the crucial indicators that suggest that is time to seek professional assistance:
Severely Bent or Many Bent Pins
It simply means that when there are several bent pins, the handling becomes too complicated, and additional damage is risked if anything is attempted to be repaired on your own. One bent pin or a few would then be easy to handle because small adjustments would straighten things out, but too many bent pins are quite likely to require professional tools to mend properly. The more pins there are bent, the harder it is to align them in the right places, especially in tight areas. Trying to fix several pins at once may break or destroy the pins further, potentially making the motherboard unusable.
Lack of Confidence or Skill
That means, if you doubt or do not feel confident you can do the job, probably it’s better to try somebody else. Repairing those bent pins requires a steadier hand and more than just some experience, a miscalculation or accident can happen, and could cause further damage than cure. You might even break some pins off entirely without having the right experience or steady hands. This could leave you with a motherboard that has suffered irreversible damage and, consequently, is very costly to replace.
Chances of DIY Repairs Leading to Irreversible Damage
What it means: If you feel that the repair may cause permanent damage to the motherboard or CPU, it is best to stop and seek professional assistance. Certain repairs, such as pin straightening or using inappropriate tools, can cause permanent damage and make the motherboard or CPU unusable. A board can suffer from pin damage, which is very delicate regarding the motherboard’s functionality. Any further physical trauma-such as breaking or crushing-will be impossible to repair. A damaged socket could also prevent the CPU from fitting or making proper electrical contact potentially ruining both components.
Seek help from a professional if
If you identify any of the signs listed above, it would be a good idea to seek help from a professional. An expert can fix the damage using proper tools, minimizing the chances of damaging your parts. In some cases, they will also be equipped with other high-end equipment, such as magnification devices, heat benches, or pin realignment jigs, that may be necessary to fix major damage.
Importance of Handling and Suitable Techniques
The carefulness in handling and proper technique in dealing with delicate things like an AM5 motherboard is important for ensuring a successful repair and not having to cause additional damage in the process. Here’s why these are important along with how they contribute towards successful repairs:
Averts Further Damage
Why it matters: An AM5 motherboard has fragile pins. You would have to be extremely careful with the pins because using too much force or any carelessness might break or permanently bend them. Careful handling ensures that the pins are not broken, and if bent, there’s no further bending to ruin the motherboard.
- Always handle using precision tools like tweezers or a needle with gentle pressure when setting the bent pins.
- Work slowly and carefully, checking the alignment after each adjustment to avoid overcorrecting.
Maintaining Component Integrity
The purpose of the repair is not only to straighten pins but also to ensure that the motherboard and CPU are in functional integrity. Handling it roughly can either cause physical damage or electrical problems that may lead to system instability.
- Keep components on static-free surfaces, and avoid touching sensitive areas of the motherboard or CPU.
- Use proper tools like magnifying glasses, which help you get a clear view of small pins without having to get too close.
Minimize the possibility of Electrostatic Discharge (ESD)
Why it’s important: Electrostatic discharge is one of the most common causes of permanent damage to electronic components. It may happen when static electricity gets transferred from your body to the motherboard or CPU, causing invisible damage that could affect their performance or cause failure.
- Wear an anti-static wrist strap to ground yourself before touching any components.
- Work in an ESD-safe environment to avoid static buildup on the sensitive pins.
- Confidence-Boosting Information to Overcome Minor Fixes
Overcoming minor fixes, such as straightening bent pins on a motherboard, can be pretty intimidating, especially for PC repair newbies. However, with the right approach and mindset, even someone who has never done it can successfully overcome these problems. Here are some tips for building your confidence and doing the repair smoothly:
Start with small feasible repairs
By starting with minor repairs, you will gain confidence in handling delicate components without making things worse. You may start with something as minor as cleaning the motherboard or reseating cables just so you get accustomed to the handling of sensitive components. Once you get comfortable, you can proceed to more complicated repairs like fixing minor bent pins.
Use the Right Tools and Techniques
The correct tools make it much easier and less probable to make a mistake during the repair. Precision tools and proper techniques give you better control in the process. Use a magnifying glass or macro lens for clear views of the pins Apply gentle pressure with precision tweezers or needle so that the damage is not exacerbated. If you’re unsure about your technique, pause, take a breath, and recheck your work before continuing.
Take Your Time and Don’t Rush
Resetting fragile pins requires a patient hand and steady nerves. Hurrying through the process increases the chances of mistakes or damage. Work in a quiet, distraction-free environment that encourages concentration. Divide the repair into smaller steps, and at the end of each one, check your work to make sure you are headed in the right direction.
Remember Mistakes Are Part of Learning
Why it works: One can err, but being wiser and moving into confidence is the key factor. If you err once, do not get disillusioned; just take up the opportunity to learn about the mistake and improve next time. If you realize that a pin has bent too much or you have blundered, then get down and reassess and use the right tools as well as techniques to undo the repair. Visit online forums or repair guides when you get stuck. They might have advice on how to overcome obstacles.
Key Takeaways

Example: Successful Recovery by a Reddit User of Pin Bent, Asus AM5 Motherboard
In the realm of PC building and restoration, online forums as Reddit are priceless resources to achieve expertise through advice and shared experiences. One successful fix was that of a pinned Asus AM5 motherboard after a user successfully straightened bent pins on the motherboard.
User’s Story of Straightening Bent Pins
The Reddit user found a few bent pins on their Asus AM5 motherboard when they were trying to remove the CPU during the build. The motherboard was not booting, and diagnostic LEDs were indicating some problems with the installation of the CPU.
The Solution
First, the user inspected the pins under a magnifying glass and located each of the bent pins. They used precision tweezers to carefully straighten the pins, taking their time and being meticulous. For large pin misalignments, they would use a credit card to help align multiple pins. Once the pins were aligned, the user reinstalled the CPU, connected the peripherals, and powered on the system. The motherboard booted successfully, and the system worked just fine.
When to Attempt a DIY Fix
If there are only a few bent pins and they are not severely misaligned, users often recommend trying to fix the issue yourself. With the right tools, a gentle touch, and patience, these types of repairs are usually successful.
Users stress the importance of having the right tools—precision tweezers, a magnifying glass, and a credit card or similar tool for aligning pins—before attempting the fix.
When to Return or Exchange
Severe Bent Pins or Multiple Bent Pins: According to the community, severe pin damage on the motherboard or several bent pins are not possible to align suggest returning to the retailer or getting an exchange from the manufacturer. Risk of More Harm: If you feel unsure about your ability to rectify the pins or even just uncomfortable with handling the process, it may be more prudent to return the motherboard rather than risk doing irreparable damage. Warranty Issues: Users advise that the warranty terms should be checked before attempting any repair as some DIY fixes might void the warranty. In case the motherboard is still under warranty, it is easier to replace or exchange the motherboard through the retailer or manufacturer.
Community Suggestions on Returns and Fixes
Customer Care Contact: Many users claim that, in case the motherboard is faulty, users should first contact the company’s customer care service regarding this problem and ask them whether there are any possible alternatives or not. Return/ Exchange Process: If the motherboard can be returned or replaced, the users are advised to pack the motherboard properly with all necessary documents, a receipt of purchase, and pictures of the damage done. If a DIY fix is attempted and the system still doesn’t work, professional repair services may be an option. Some users suggest taking the motherboard to a technician who specializes in motherboard repairs.
Conclusion
Patience and precision are your best friends when it comes to repairing bent pins on an AM5 motherboard. These components are delicate, and any rush to fix the issue may result in further damage. Straightening bent pins requires a steady hand and a careful, methodical approach. With such care taken in inspecting every pin, using the appropriate tools, and then proceeding with gentle care, you’ll be able to tell between an easier repair and a more complex one. If you feel frustrated while fixing, it is better to leave and come back when your head is fresh rather than finishing with a rush.
While many users will confidently take minor repairs into their hands, one should know when to seek help. Any extensive damage or when there is no confidence in performing the solution without further creating a worse problem calls for professional service. Sometimes, even small errors in the repair process can lead to significant issues, such as breaking pins or damaging the motherboard. Many repair services offer expertise with delicate components, and they have the tools necessary to handle repairs without putting your parts at risk. Don’t hesitate to ask for help if needed; the peace of mind it brings is worth the extra effort.
The AM5 socket is at the core of AMD’s latest generation of processors, powering a vast range of high-performance PCs. The socket is specifically designed for cutting-edge Zen 4 architecture, supporting features such as DDR5 memory and PCIe 5.0, pushing the boundaries of what modern systems can do. The AM5 socket isn’t just for gaming or performance computing but is suitable for everything from workstations to high-end servers. As it sits in the center of modern computing, the AM5 motherboard must be kept working well, ensuring the stability and overall performance of the entire system. Proper handling, care, and maintenance of your motherboard and its components are necessary to make the most of what this advanced technology has to offer.
Fixing bent pins on an AM5 motherboard is definitely possible with the right mindset and tools, but it requires patience, precision, and an understanding of when to ask for professional help. The AM5 socket is very important in the future of computing, so proper function is the key to optimizing your PC. Whether you do it yourself or seek help, remember that careful handling can make all the difference in preserving the integrity and performance of your components.


